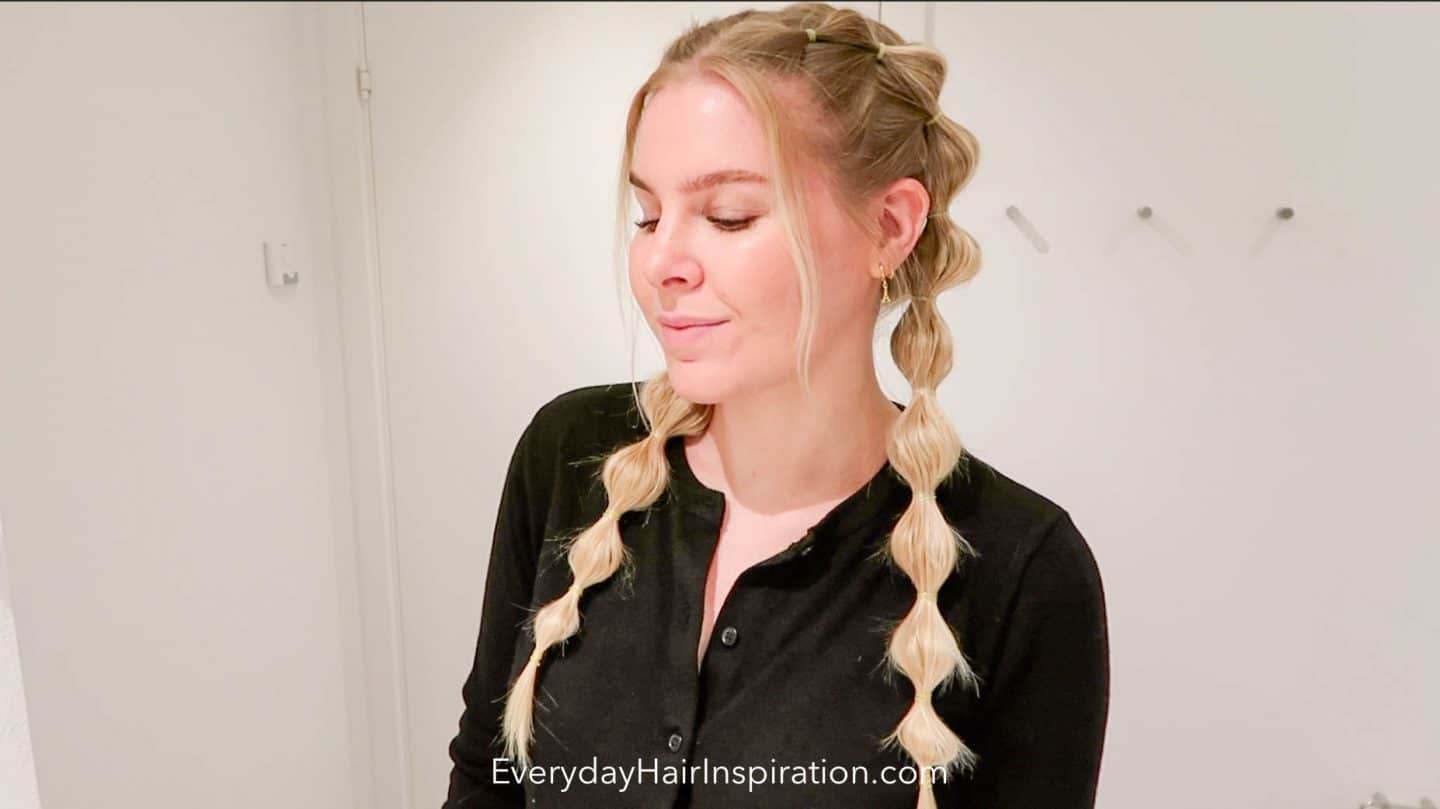
Bubble braids are a fun and trendy way to elevate your hairstyle with minimal effort. Whether you’re a braiding pro or a beginner, learning how to create this playful look is easy! In this post, we’ll show you 3 simple ways to bubble-braid your own hair for any occasion.
This post is all about easy bubble braids!

Is a bubble braid a braid?
Technically, a bubble braid isn’t a traditional braid, but it’s still considered a braid-like hairstyle. Here’s why:
Traditional Braid vs. Bubble Braid
- Traditional Braids: These involve weaving three sections of hair (in a basic three-strand braid) or more (in a French or Dutch braid) over and under one another to create a tightly woven pattern.
- Bubble Braids: While they don’t require weaving, bubble braids involve creating sections of hair, typically secured with small elastics, to form “bubbles” or puffs. These sections are pulled out to create volume and texture, mimicking the look of a braid without actually interweaving strands.
So, while a bubble braid doesn’t follow the classic “over and under” method of braiding, it is still called a braid because of its similar structure and the way it’s styled. It’s more of a decorative twist on the traditional concept, offering a fun and textured alternative to regular braids!

Why should I choose a bubble braid hairstyle?
A bubble braid hairstyle is a great choice for several reasons! Here are a few benefits:
1. Fun and Trendy Look
Bubble braids are a fun, playful, and stylish way to elevate your usual braid. They add a little extra flair and texture, making them perfect for both casual and more dressed-up occasions. The “bubble” effect creates a unique, eye-catching look that stands out.
2. Versatility
Bubble braids can be done in different ways—in a loose or tight, high or low ponytail. You can do a single braid, double braid or choose to do a beautiful half up half down. This versatility allows you to adjust the style to suit your personality or the event you’re attending. You can wear it to a party, a casual day out, or even a more formal event with the right accessories.
3. Low Maintenance
Compared to intricate traditional braids, bubble braids are relatively easy to create and can be done in a shorter amount of time. They’re also pretty forgiving, so if a bubble isn’t perfectly symmetrical, it still looks cute and natural. Plus, once they’re done, the style holds well throughout the day.
4. Suitable for All Hair Types
Whether you have straight, wavy, or curly hair, bubble braids can work for you. They add volume to thinner hair, and on thicker hair, they create more noticeable sections, making the bubbles stand out.
5. Protective Style
Like many other braids, bubble braids help keep your hair in place and reduce friction, protecting your strands from damage. If you’re trying to grow out your hair or want a break from heat styling, bubble braids offer a cute, protective option.
6. Perfect for Any Hair Length
Although bubble braids are commonly done with longer hair, they can be adapted for shorter hair as well. You can make smaller sections or opt for mini bubble braids if your hair isn’t very long.

3 Different Ways To Bubble braid your hair
What You’ll Need:
- Hair elastics (small, clear ones work best)
- A hairbrush or comb
- Hairspray or texturizing spray (optional, for extra hold)
- Bobby pins (optional, for securing any stray pieces)
Prep Your Hair
Start by brushing through your hair to remove any tangles. You can add a little texturizing spray or dry shampoo to give your hair extra volume and texture, which will make the bubbles stand out more.
If you want a bit more body, you can add a light wave to your hair with a curling iron or straightener, but this is optional.
Bubble braid
- Gather all your hair and secure it into a ponytail.
- Place an elastic a few centimeters down from the base of the ponytail.
- (Optional) Cover the elastic with a small section of hair for a polished look – (Tutorial: How to cover an elastic)
- Gently pull the sides of each section to create a bubble effect.
- Continue adding elastics and creating bubbles until you reach the end of your hair.
- Grab all the hair and tie it into a ponytail

French bubble braid
- Start by creating a small ponytail at the top of your head.
- Secure the first ponytail with a clip to keep it out of the way.
- Create a second ponytail just below the first one.
- Combine the first and second ponytails by tying them together with an elastic.
- Gently pull the hair between the two elastics to form a bubble effect.
- Continue adding elastics and creating bubbles until you reach the nape of your neck.
- Once you have no more hair to add, finish off with a simple bubble braid.

Double bubble braid
- Divide the hair into two equal sections down the back of your head.
- Clip one section out of the way.
- Create a small ponytail at the top of your head.
- Secure the first ponytail with a clip to keep it out of the way.
- Make a second ponytail just below the first one.
- Tie the first ponytail and the second ponytail together with an elastic.
- Gently pull the hair between the two elastics to form a bubble effect.
- Continue creating bubbles by repeating steps 5-7 until you reach the nape of your neck.
- Once you run out of hair to add, finish off with a classic bubble braid.

Step by step Video tutorial
https://youtu.be/W2_yYZ3kMPo
This post was all about easy bubble braids for beginners!
Related Articles
You may also find the following articles helpful: